 Chalk to Grass
Free session · SES-0002 · U16+ / HS
Press on the Trigger: Back-Pass to the CB
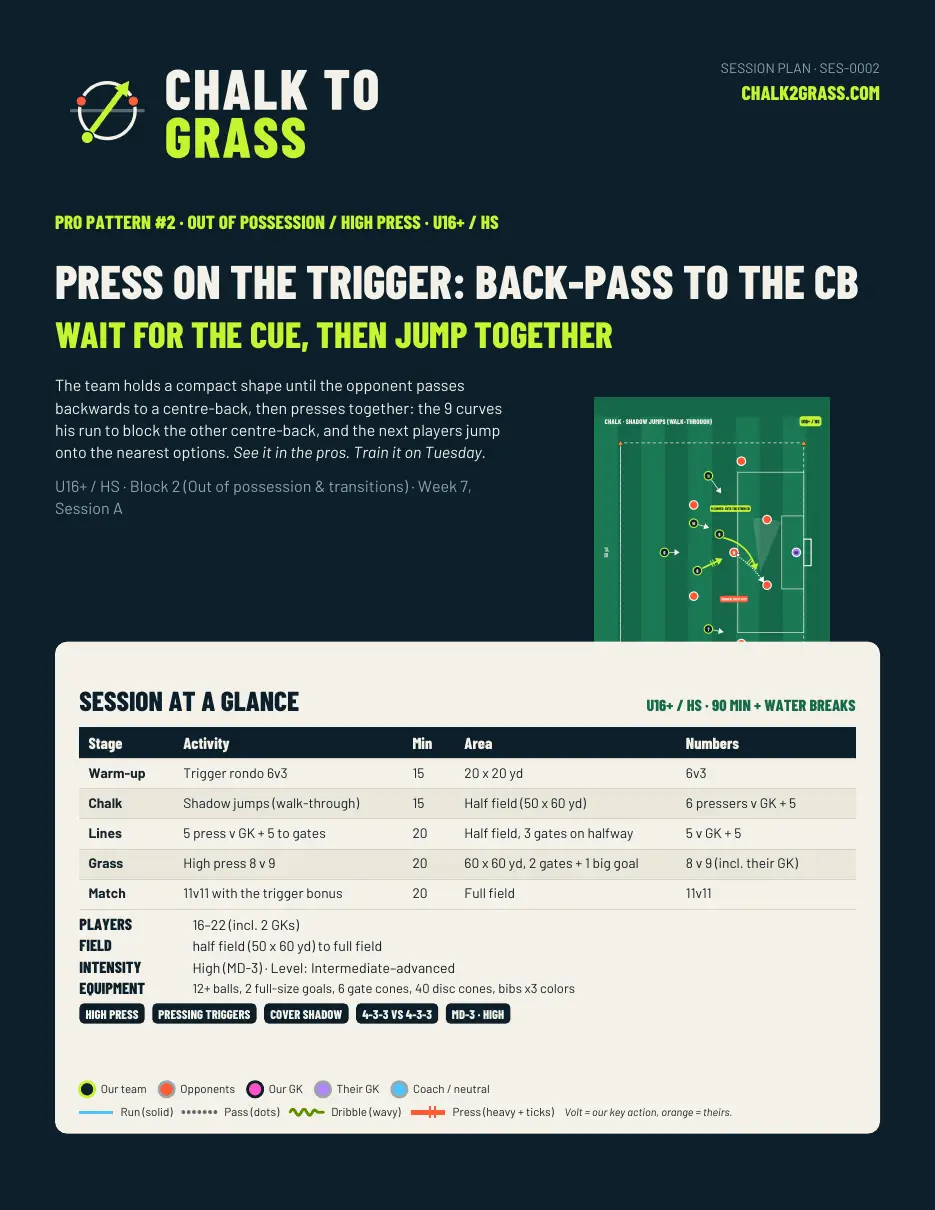
The team holds a compact shape until the opponent passes backwards to a centre-back, then presses together: the 9 curves his run to block the other centre-back, and the next players jump onto the nearest options.
Free Signed off by our coach. Free with the email signup: the PDF opens right after you join.
- Players: 16–22 (incl. 2 GKs)
- Time: 90 min plus water breaks · High (MD-3)
- Space: half field (50 x 60 yd) to full field
- Curriculum: U16+ / HS · Block 2 (Out of possession & transitions) · Week 7, Session A
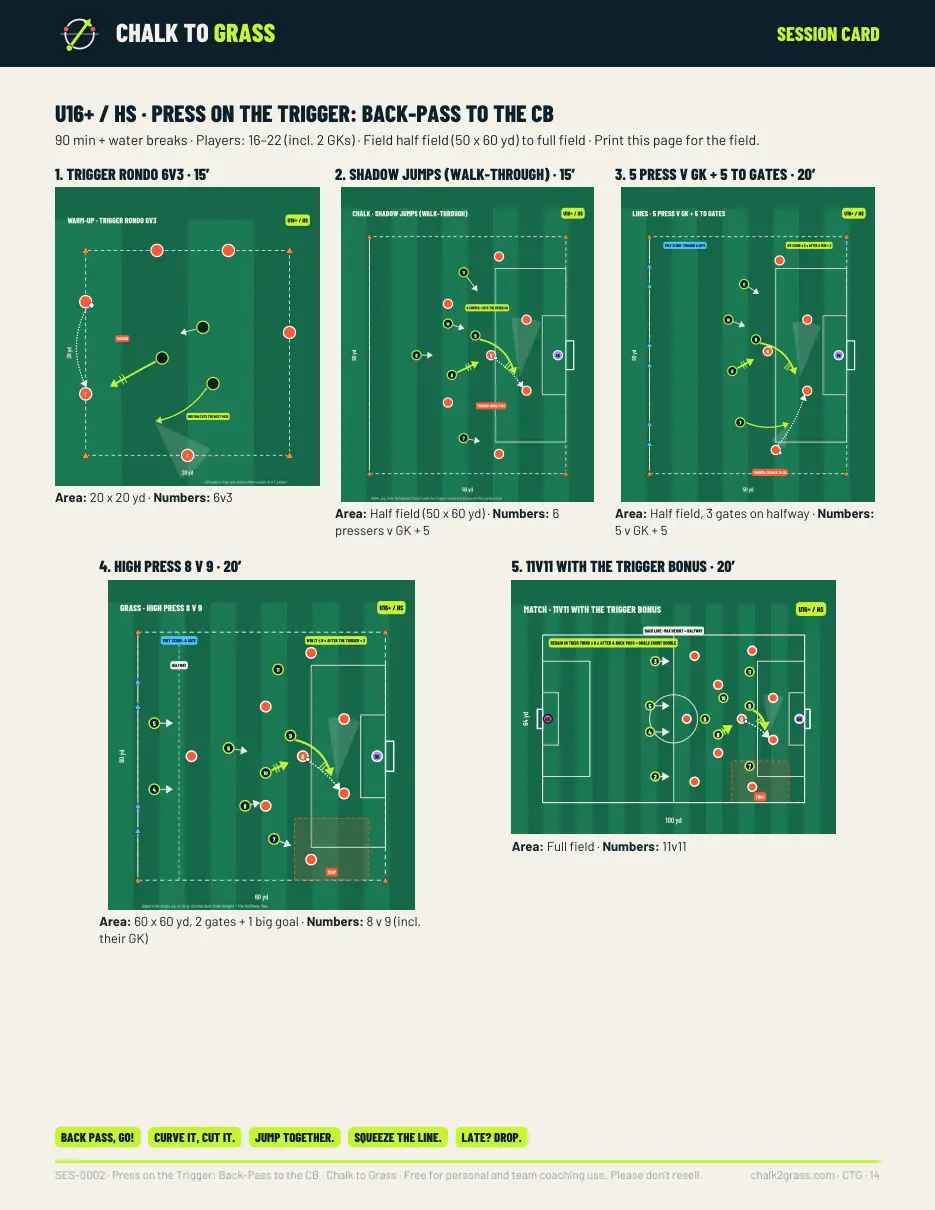
How it runs
Five stages
| Stage | Activity | Time | Opponent picture |
|---|---|---|---|
| Warm-up | Trigger rondo 6v3 | 15 min | Generic trigger (pass to a T player) |
| Chalk | Shadow jumps (walk-through) | 15 min | Coach calls the build shape: A (2 + 1), B (3 + 1) or C (GK spare) |
| Lines | 5 press v GK + 5 to gates | 20 min | Builders choose 2 + 1 or 3 + 1 each rep (Phases A–B) |
| Grass | High press 8 v 9 | 20 min | Their coach rotates A, B and C each round |
| Match | 11v11 with the trigger bonus | 20 min | Opponents pick a build card (A, B or C) every 5 minutes |
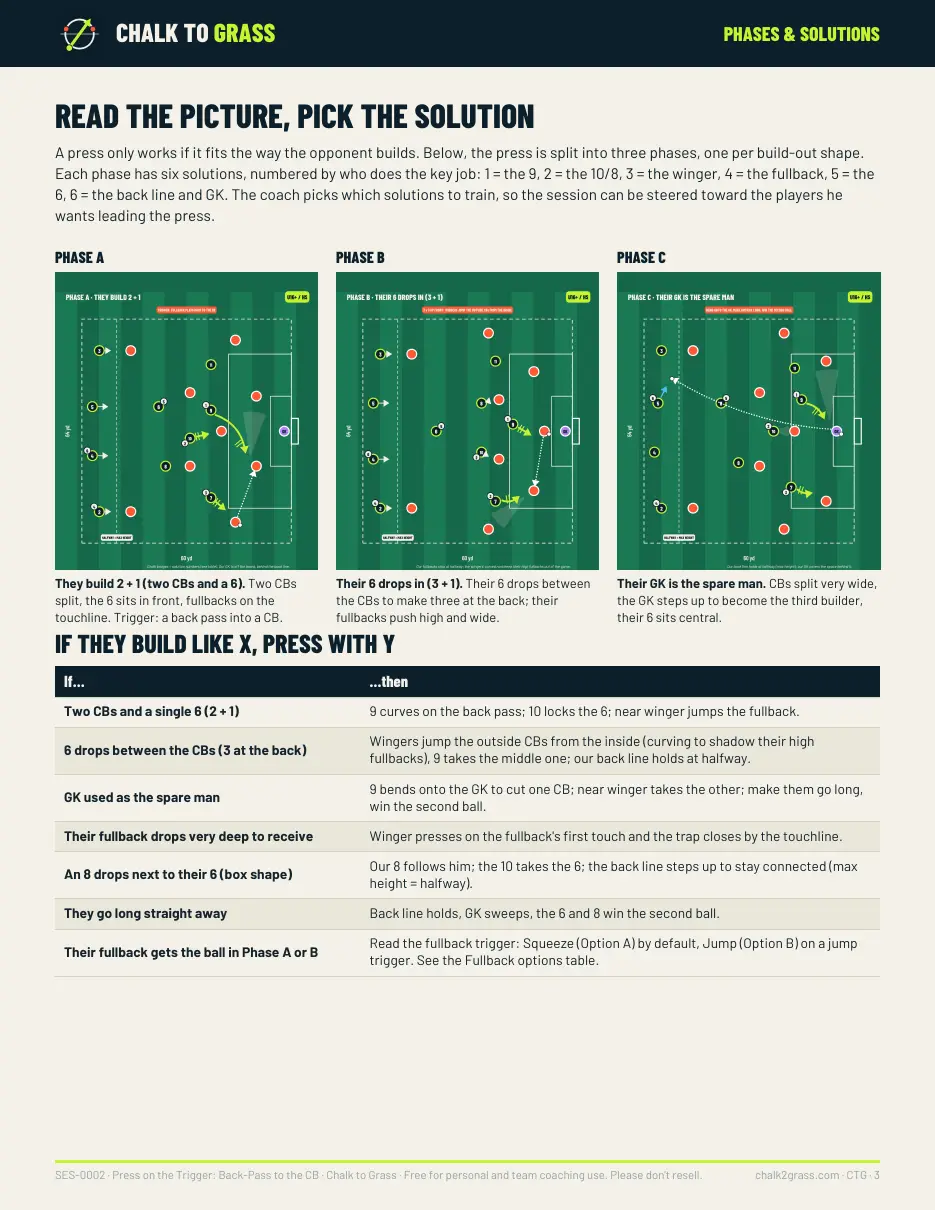
Phases by opponent picture
- Phase A · They build 2 + 1 (two CBs and a 6). Two CBs split, the 6 sits in front, fullbacks on the touchline. Trigger: a back pass into a CB. Six solutions, numbered by who gets the job.
- Phase B · Their 6 drops in (3 + 1). Their 6 drops between the CBs to make three at the back; their fullbacks push high and wide. Six solutions, numbered by who gets the job.
- Phase C · Their GK is the spare man. CBs split very wide, the GK steps up to become the third builder, their 6 sits central. Six solutions, numbered by who gets the job.
If they build like X, press with Y
| If… | …then |
|---|---|
| Two CBs and a single 6 (2 + 1) | 9 curves on the back pass; 10 locks the 6; near winger jumps the fullback. |
| 6 drops between the CBs (3 at the back) | Wingers jump the outside CBs from the inside (curving to shadow their high fullbacks), 9 takes the middle one; our back line holds at halfway. |
| GK used as the spare man | 9 bends onto the GK to cut one CB; near winger takes the other; make them go long, win the second ball. |
| Their fullback drops very deep to receive | Winger presses on the fullback's first touch and the trap closes by the touchline. |
| An 8 drops next to their 6 (box shape) | Our 8 follows him; the 10 takes the 6; the back line steps up to stay connected (max height = halfway). |
| They go long straight away | Back line holds, GK sweeps, the 6 and 8 win the second ball. |
| Their fullback gets the ball in Phase A or B | Read the fullback trigger: Squeeze (Option A) by default, Jump (Option B) on a jump trigger. See the Fullback options table. |
Fullback options: Squeeze or Jump
When the ball goes out to their fullback in Phase A or B, our fullback has two answers. Teach both. Option A is the default and keeps the back line safe. Option B wins the ball higher but opens space behind, so it needs a clear trigger and a quick cover shift. Our fullback makes the call and shouts it (“SQUEEZE!” or “JUMP!”) so the back line knows which picture it is in.
- Option A · Squeeze & Take the Winger. Our fullback squeezes up to halfway (max height) and takes their winger, goal-side and touch-tight. Our winger curves onto their fullback from the inside; the curve keeps the line back to their CB in his shadow. The back line steps up with the fullback and stays connected. Nobody goes past halfway. Risk: Their fullback gets time and space if our winger is slow to curve, so he can step in or switch play.
- Option B · Jump. Our fullback jumps onto their fullback on the trigger, arriving as the ball arrives, showing him down the line. The back line shifts and covers behind: the near CB slides across into the fullback's space, the other CB follows, the far fullback tucks in. Only the jumping fullback may cross halfway. The rest stay at or behind halfway; the 8 or 6 picks up their dropped winger. Risk: Space opens behind the jumping fullback; a ball over the top can find their winger or striker running in behind.
| If you see… | …then |
|---|---|
| Their fullback receives facing his own goal | Jump (B) |
| Their fullback takes a poor first touch (ball bounces off him, or he looks down at it) | Jump (B) |
| Our winger is late, so their fullback is free and about to play forward | Jump (B) |
| Ball is on the touchline: the line is a second defender | Jump (B) |
| Their winger has already dropped deep (into midfield, not behind us) | Jump (B): the 8 or 6 picks up the winger |
| Their winger is high or pinning our fullback | Squeeze (A): stay with the winger |
| Our winger arrived on time and is curving onto their fullback | Squeeze (A): let the winger press |
| Unsure / two triggers clash | Squeeze (A) is the default: safe first, jump next time |
Coaching cues
- “Back pass, GO!”
- “Curve it, cut it.”
- “Jump together.”
- “Squeeze the line.”
- “Late? Drop.”
Board language: solid = run, dotted = pass, wavy = dribble. Our players have a volt ring, opponents are solid orange, keepers pink (ours) and purple (theirs).
How do I get the PDF?
Join the free email list on the free sessions page. The confirmation page opens SES-0001 and SES-0002 (15 pages, printable session card included).